
Joshua Tree National Park
I vividly remember the time my younger sibling visited the U.S. and we spontaneously drove to Joshua Tree at night to see the stars. Hearing that we could see the Milky Way, we set off without much thought, unsure if we would actually see any stars. After driving for a while, we stopped the car and turned off the headlights, and I will never forget the moment when a shooting star fell right in front of us. Joshua Tree is a place filled with unique landscapes and charm even during the day, but seeing the sky filled with stars and the Milky Way at night amplifies that beauty. Especially, the experience of gazing at the shining sky in the stillness of the quiet desert is truly special.


From my experience, the best time to see stars in Joshua Tree was in August. I particularly remember how vividly the Milky Way appeared. Last August, after reading an article about the Perseid meteor shower, I returned to Joshua Tree once again. While using a professional camera can yield much more stunning photos of stars, you don’t necessarily need to be an expert. In fact, you can capture truly impressive photos with just a smartphone. So today, I would like to share a simple method for taking star photos with an iPhone.
Taking Star Photos with an iPhone
(1) Prepare your iPhone and a stabilizing device
First, you need an iPhone (I used an iPhone 14 Pro Max) and a tripod or any device that can stabilize your phone. At that time, the tripod I ordered hadn’t arrived, so I used a phone holder meant for airplanes. I secured it to the car door as shown in the first photo, but as long as you can stabilize your phone, any tool will work, not just a tripod.
(2) Set the exposure value
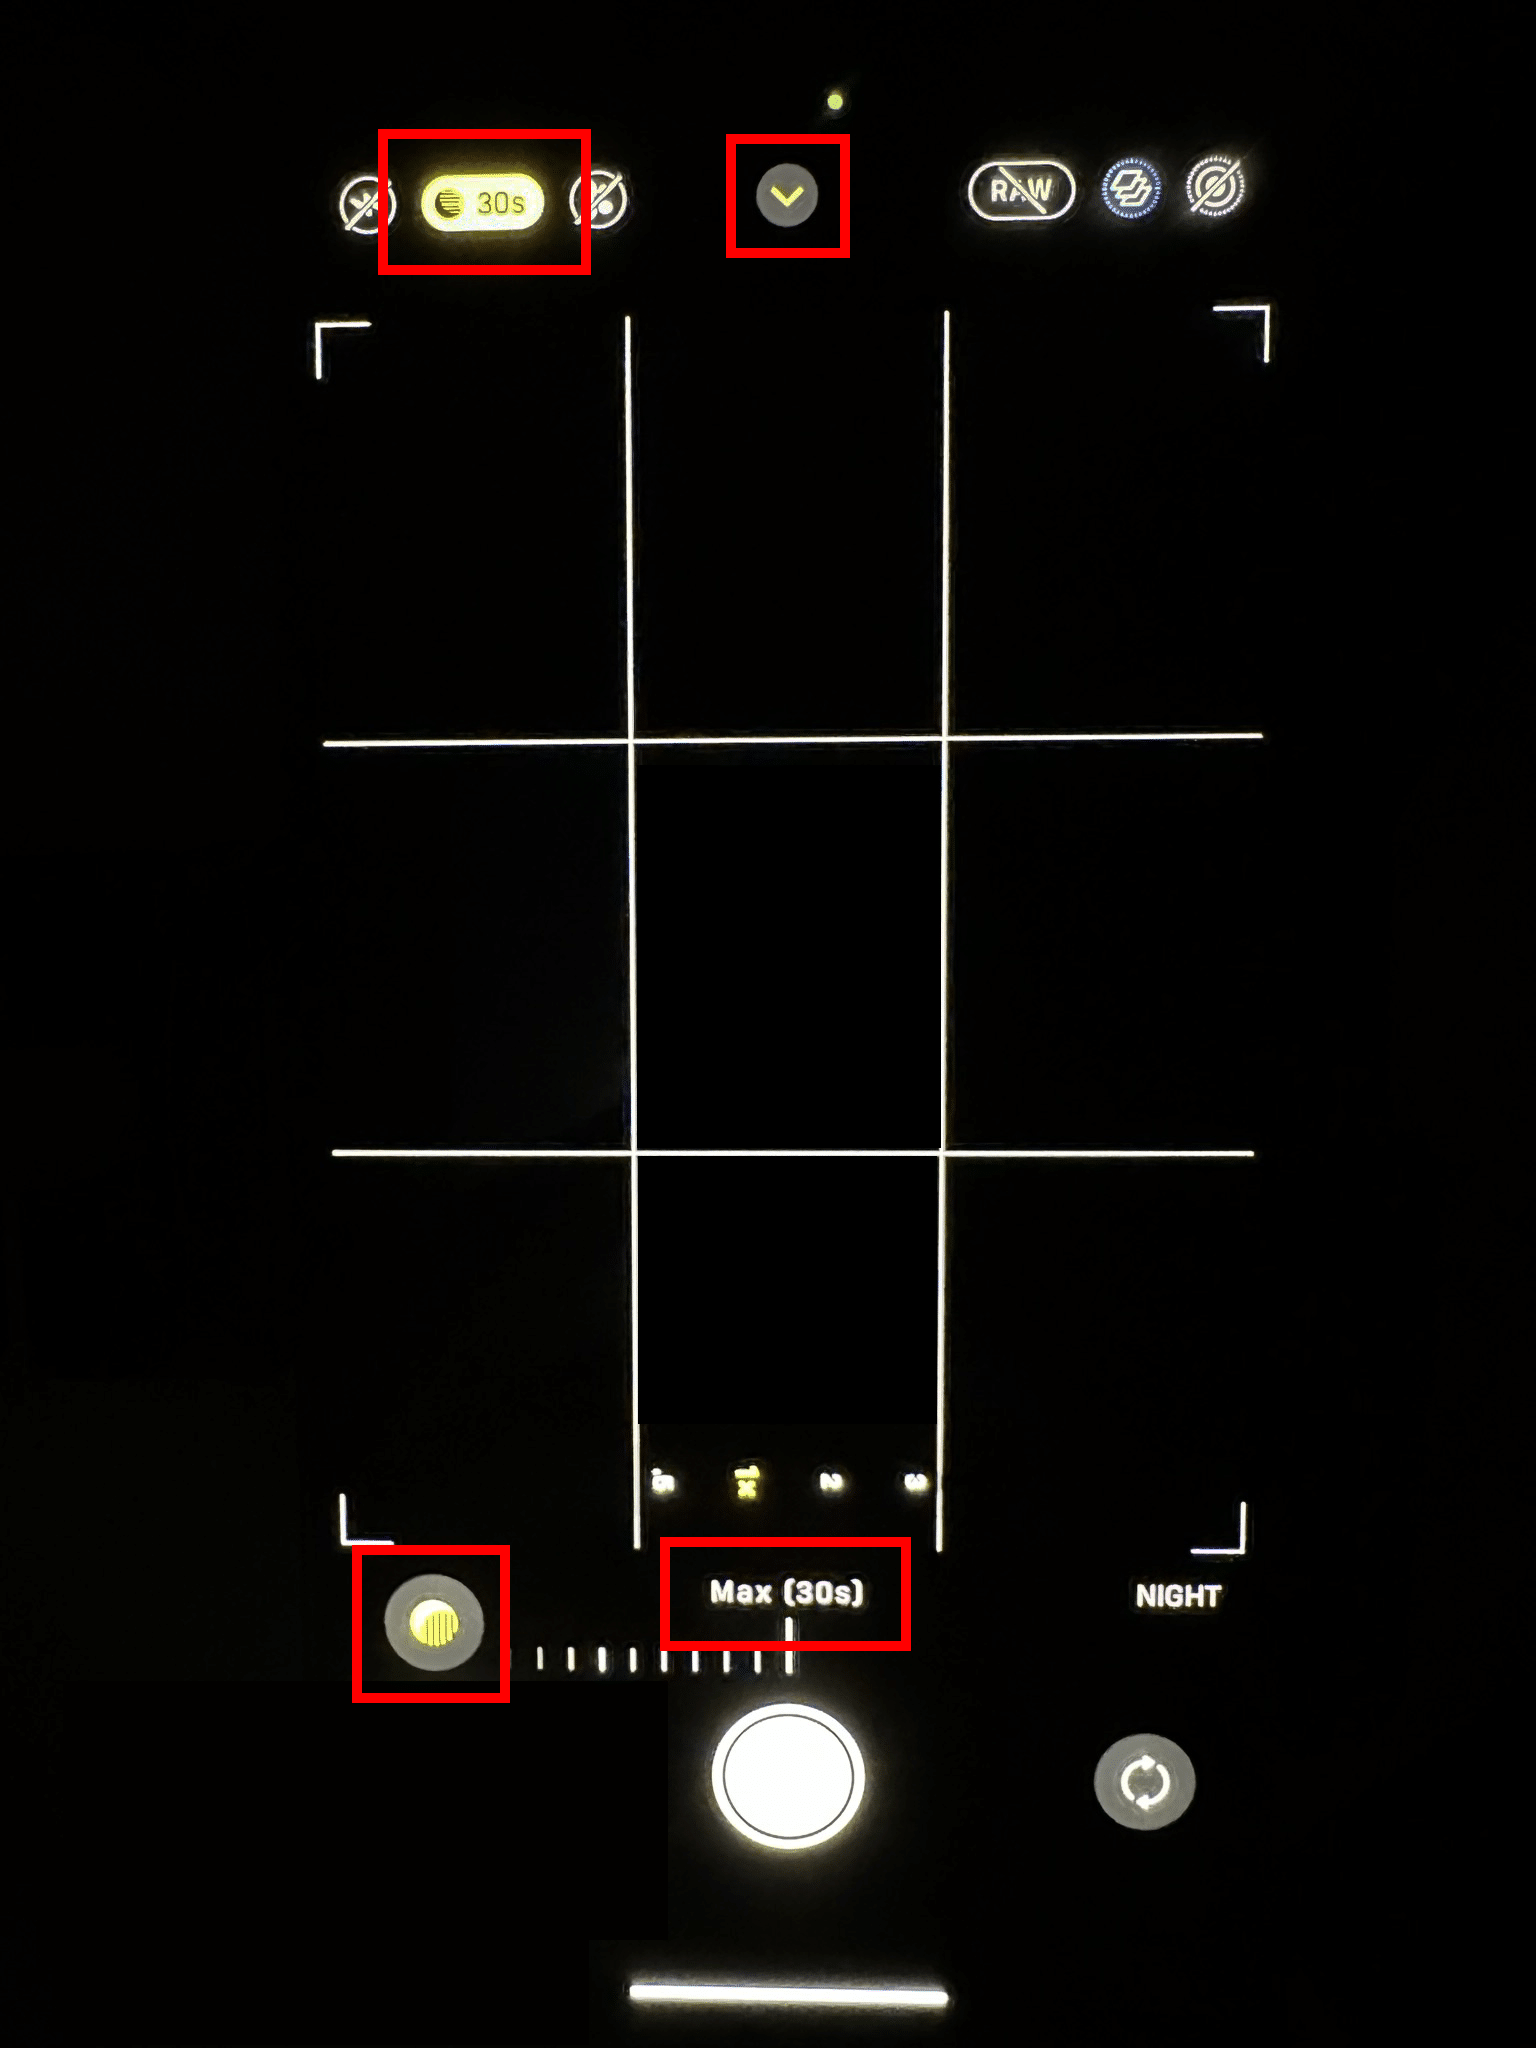
In dark environments, the iPhone’s night mode automatically activates. By tapping the arrow at the top of the screen, camera setting options appear, where you can adjust the exposure value. Referring to the red box in the second photo, you can set the exposure value for up to 30 seconds. At this time, the camera must be stabilized to set the maximum value of 30 seconds. (See the second photo below)
(3) Start shooting
After setting the exposure value, press the shutter button, and the photo will be taken according to your settings. If the phone is stabilized, the iPhone will gather light for 30 seconds to capture the photo.


(4) Precautions during shooting
Since star photos utilize long exposure times, you must ensure that the phone does not shake during the shot. Even slight movements can cause the photo to come out blurry.
(5) Avoid light interference
It’s also important to note that no light should enter the surroundings during the 30 seconds of shooting. In the last photo, you can see an example of a failed shot where cars passing by let in light. To capture the Milky Way and stars more clearly, you need to maintain a state where external light is blocked from start to finish.
Results of iPhone Star Photos


This is a photo of stars taken using the method above. It’s not perfect, but you can see that it’s possible to capture beautiful star photos even with an iPhone.
Joshua Tree National Park Visitor Center
I hope this tip helps those who want to take star photos, and if you want to cherish a special night sky in nature, be sure to give it a try.
